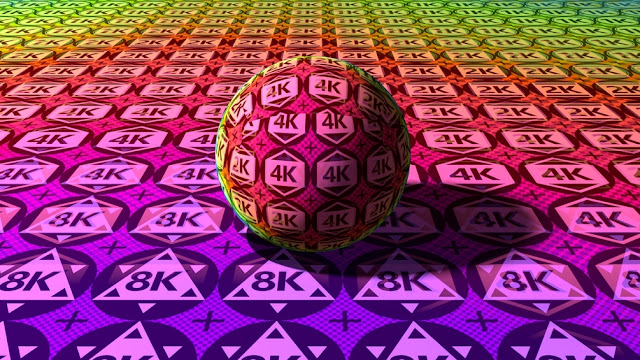
In this entry we are going to talk about MipMap textures to make our renders more efficient. Not just to improve render times but solve some unwanted moire. Let's dig in!
This technic is as basic as powerful, and you are probably using it by default in you software and render engine. But what's this and how can we use it?
A MipMap texture is a texture that has been previously resized to a bunch of lower resolutions than the original to let the render engine use the more suitable size depending on what's needed. So if we are close to it, the renderer will use the biggest resolution available and the further we go, the smaller it's used. Simply as that. Be aware that our texture will increase it's size by 33%.
Saving us render time if we are far from the texture, so it only computes the low resolution version of it. And also preventing us from moire due to textures with higher frequency than our render output can handle.
This technic not only uses one texture size per object, those are blended so we can use different resolutions in the same object (ie. in a large floor, high res textures at front, and low res textures further, to prevent moire).
 |
| David Gruwier - Texture Resolution Checker |
The great David Gruwier is sharing his MipMap Resolution Checker Texture (https://gumroad.com/l/LJehG) for free! This texture, instead of being the same image resized, displays a different image for each resolution used. Allowing us to check the effect but more importante, to know what's the maximum resolution needed for our texture. So we don't have to guess anymore if our texture has enough pixel or if we are using an 8k when with a 4k would be more than enough.
By default, you will have a "Mip-Mapping bias" (also named as "blur" or "offset") value at 0. If you decrease it, your render engine will use higher resolutions, so sharper renders but also losing the advantages of this technic (more memory usage and possible moire), and if you increase the value, the opposite will happen. Loss of sharpness but less moire.
Last but not least, we should be careful when using MipMapping with UV textures. If we have a black background with our UV texture on top, the moment it is downsized, the edges will became blurry and some black will come to our object. To prevent this there is two technics, which combined gives the best solution.
The first one is not just paint the UV until the edge, we should extend it some extra pixel. With most softwares, you can usually do it automatically by adding a padding value when exporting the texture.
And the second one, is not to use a black background, instead, use a color close to the texture.
That's everything we need to know about MipMap textures.
Thanks for reading!
By default, you will have a "Mip-Mapping bias" (also named as "blur" or "offset") value at 0. If you decrease it, your render engine will use higher resolutions, so sharper renders but also losing the advantages of this technic (more memory usage and possible moire), and if you increase the value, the opposite will happen. Loss of sharpness but less moire.
Last but not least, we should be careful when using MipMapping with UV textures. If we have a black background with our UV texture on top, the moment it is downsized, the edges will became blurry and some black will come to our object. To prevent this there is two technics, which combined gives the best solution.
The first one is not just paint the UV until the edge, we should extend it some extra pixel. With most softwares, you can usually do it automatically by adding a padding value when exporting the texture.
And the second one, is not to use a black background, instead, use a color close to the texture.
 |
| 1. Basic UV Paint 2. UV with padding 3. UV with padding and colored background |
 |
| Downsizing with a basic UV Paint: 1. 2048px 2. 512px 3. 128px |
That's everything we need to know about MipMap textures.
Thanks for reading!

Comments
Post a Comment